Pencils down, thinking begins when sketching Goku. Lines carry weight because they suggest motion before any action happens. A still figure pulses with potential, shaped by choices far beyond tracing outlines. Look closer – every angle answers a question about strength held in check. Tutorials show hands moving across paper, yet skip the reasons behind spiked hair or narrowed eyes. Power hides in posture, not perfection of form. What appears simple holds layers meant to be felt, not just seen. Even silence in the drawing breathes intensity.
Start with the Basic Head Shape
Look first at the form around his head and face. A roundness rules here, though the peak pulls up just a bit. This tiny rise? It leaves room for wild hair, standing tall as if charged. Begin with a soft ring, drawn gently. Add a slight arc rising from the crown. Hold off on firm lines for now. Start with light strokes you’ll remove afterward. Not built to stay, this rough shape just helps balance the parts.
First Sketching Steps
- Draw a light circle
- Add a slight curve at the top
- Keep lines soft and easy to erase
- Focus on overall proportions first
- Avoid dark outlines at this stage
Add Facial Guidelines
Draw a pair of flat marks inside the ring – center level first, then another just beneath. The eyes sit where the middle stroke runs. Ear positions match the top and bottom bounds of that lower guide, unless strands cover them up. What almost nobody points out? Balance isn’t something Toriyama chases. A tiny difference in how the eyes line up brings movement to a face. Not quite level – one sits just above the other. Strands fall where they want, never copying each side exactly. While sketching, leave room for small flaws. These quirks don’t ruin realism – instead, they build life.
Face Placement Guide
| Feature | Position |
| Eyes | Along the center guideline |
| Ears | Between the eye and nose guides |
| Nose | Slightly below center |
| Mouth | Below the nose |
| Hairline | Above the circle |
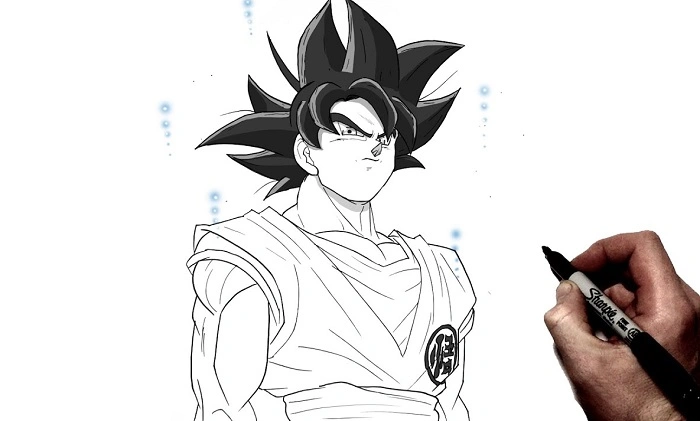
Draw Goku’s Iconic Hair
Take a look at the hair now. Instead of focusing on fine details, Dragon Ball builds it through bold shapes first. One chunk flows one way while another shifts beside it – each part moves with purpose. Big pointed forms spread out from the center of the head like rays. Usually you will spot three main ones up front and above. Not by chance – these lines rise up while angling back, like they’re pushing against air or speeding forward. Forget “hair” altogether; picture a force around the head instead. Draw them as filled-in areas, not strands. Shape before small features.
Hair Drawing Tips
- Focus on large spikes first
- Use bold shapes instead of strands
- Draw three major front spikes
- Angle spikes upward and backward
- Refine details later
Sketch the Eyes, Nose, and Mouth
Out of everything, where things sit counts more than how they look. Narrow ovals, those eyes tilt upward, cutting toward the edges of the face. Flat and heavy, the brows hang close beneath, balancing out the pointed gaze above. A small mark like a check forms the nose, tucked just off center. The mouth shifts with mood, though most often it stays tight and unspread. Out loud, Goku pulls his mouth wide, teeth showing clear. When quiet, his face stays more closed, shapes held firm. Try turning those looks from different sides – don’t stop at straight-on.
Also Read: How to Use a Menstrual Cup
Build the Body Structure
Eight heads high – that’s how Goku often appears when fighting. Think bigger than real life, a choice artists such as Toriyama make on purpose. Instead of accuracy, they stretch proportions for effect. Long arms and legs show motion clearly, built more for agility than muscle mass. Start with rough shapes, yet shift toward flowing strokes that suggest movement. When showing energy buildup, have arms and legs stretch outward at sharp angles instead. The shoulders lift, while the spine bends slightly backward meanwhile. Each stance sketch holds a hint of inner drive, even in its simplest form.
| Body Part | Style |
| Height | About 8 heads tall |
| Arms | Long and athletic |
| Legs | Extended for action poses |
| Shoulders | Broad but flexible |
| Spine | Often curved during action scenes |
Draw the Hands, Feet, and Clothing
Fingers come across as stubby, sometimes nearly square. Boots smooth out foot shape into gentle ovals. The toes show just enough to suggest form. Short digits keep things clean. Focus holds where it matters – shoulders shift, waist turns, neck adjusts. Simplicity guides the way eyes move across the figure. Folds move like tubes when you put on clothes – orange gi, blue shirt underneath, red bands around wrists. At bends, like elbows, wrinkles show up. Only there. Nothing more.
Clothing Details
- Orange gi
- Blue undershirt
- Blue belt
- Wristbands
- Rounded boots
- Simple fabric folds
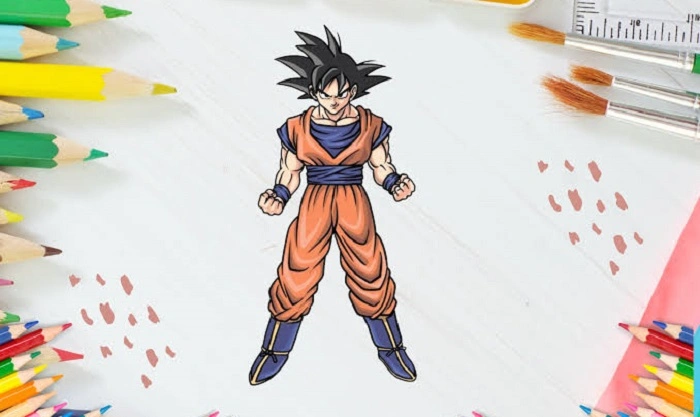
Add Color to the Drawing
Last comes coloring. Back then, printing costs kept colors few. Not a harsh warning hue, Goku’s orange feels mellow – shadowed like burnt sienna, lit by creamy near-whites. His blue top pulls toward the deep navy. Skin shows up somewhere between sun-kissed tan and soft peach. Today’s digital artists get it right, pulling shades straight from preserved originals stored years ago.
| Area | Color |
| Gi | Orange |
| Undershirt | Dark Blue |
| Wristbands | Blue |
| Boots | Blue and Yellow |
| Hair | Black |
| Skin | Light Tan |
Use Negative Space for Better Depth
Notice the empty areas. Gaps between arms and body, spaces under thighs, hollows within closed hands – they guide how we see. When parts touch too often, the form loses depth. Keep limbs apart when stillness isn’t the goal. The room around shapes hints at motion waiting to begin.
Compare Your Drawing to Different References
Start by checking how steady your drawing feels. Instead of matching it to polished reference shots only, stack it beside various real panels – different angles, relaxed postures, moments mid-move. Try a profile view. Add a squatting pose. Toss in an idle stand. See if it still fits. Recognition builds through repetition, not one flawless match. It clicks when the character shows through every time, no matter the position.
Practice Ideas
- Draw Goku from the side
- Sketch a fighting pose
- Create a standing pose
- Try a smiling expression
- Draw an energy-charging stance
Understand the Style Behind the Character
Nothing vanishes overnight. Learning to draw Goku comes down to noticing shapes formed through years of weekly comics and tight limits. Page dimensions, press schedules, who buys the books – each played a part in forming his look over time. It is more than copying edges on paper. This act ties you directly to choices made long ago, pressed into every panel.
Most figures come with hidden expectations shaped by their world. Not just Goku follows these quiet patterns. Spot the pattern, then copying shifts into something new. What looks like mimicry turns out to be reinvention.
FAQs About Drawing Goku
Is Goku easy to draw for beginners ?
Yes. His design uses simple shapes and bold features, making him a good character for beginners to practice.
What should I draw first when sketching Goku ?
Start with the head shape and facial guidelines before moving on to the hair and body.
How many hair spikes does Goku usually have ?
Most versions show around three major front spikes along with several larger spikes around the back and sides.
What colors are used for Goku’s outfit ?
His outfit is mainly orange with a dark blue undershirt, belt, wristbands, and boots.
How can I make my Goku drawing look more dynamic ?
Use action poses, keep space between body parts, and angle the hair and limbs to suggest movement.
Most figures come with hidden expectations shaped by their world. Not just Goku follows these quiet patterns. Spot the pattern, then copying shifts into something new. What looks like mimicry turns out to be reinvention.