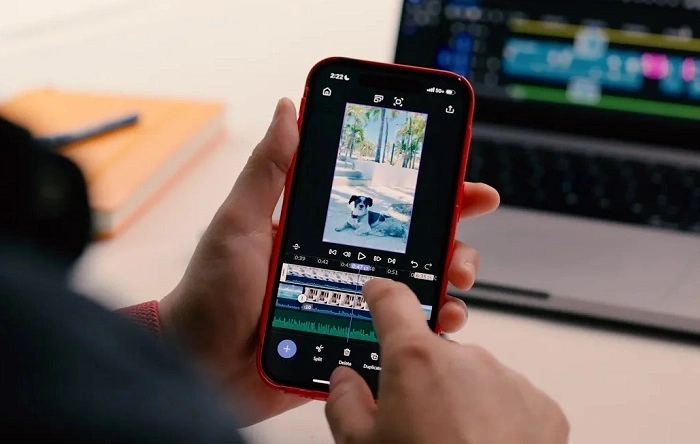
Working with video on an iPhone? You do not need high-end tools or costly equipment. Hidden inside your phone, the built-in Photos app handles a surprising amount of editing work – smoothly, without fanfare. Many people jump straight to outside apps, thinking extra options bring superior outcomes. Still, quiet improvements live right in Apple’s own editor: light levels change in small steps, pressing harder adjusts exposure on certain phones, while background sound lowers itself during spoken clips. Nothing here shouts for notice. Instead, actions follow gestures, moments, and what you’re doing.
Start by Watching the Entire Video
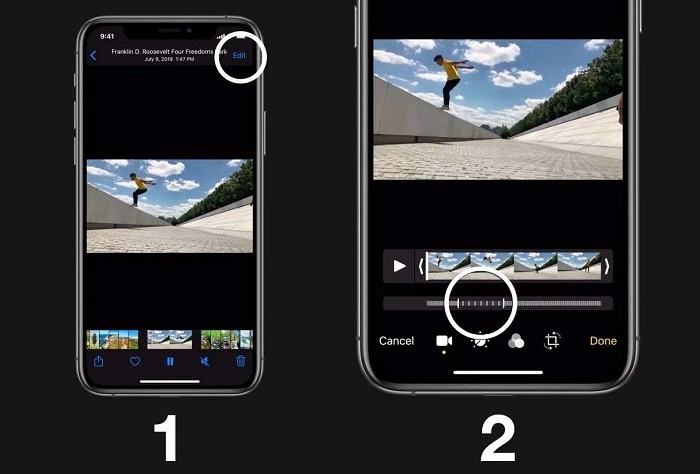
Open the video inside the Photos app. Press Edit next to the share button. Icons show up across the bottom – crop tool, effects, brightness controls. Before adjusting anything, stop. Watch it all the way through, full display, untouched. Let it run from beginning to black. See how the glow softens near the finish, where motion hitches briefly, when voices drop just under understanding. Start by watching closely, not changing things right away. That moment of waiting gives your mind a chance to catch mistakes that normally slip through.
Quick Steps
- Open the Photos app
- Select your video
- Tap Edit
- Watch the full clip before making changes
- Note any problems you want to fix
Adjust Exposure and Color
Start by tweaking exposure or color – if things look off. Move the “Light” slider? That shifts shadows, highlights, brightness all at once. Apple bundles them together to keep it clean. Trouble is, nothing works solo. Pump up the light and you might drain contrast where it’s already bright. Too low might wipe out shadows. Try tiny shifts – one-fourth swipes – then check again every time. Getting it exact is key since iPhones tweak screen brightness depending on surroundings. What you adjust outside can shift when seen inside.
Color Adjustment Tips
| Setting | What It Affects |
| Light | Brightness, shadows, highlights |
| Contrast | Difference between dark and bright areas |
| Saturation | Color intensity |
| Warmth | Overall color temperature |
Trim Unwanted Footage
Second step is trimming. Slide the timeline borders along the bottom edge. As you go, the playhead jumps every tenth of a second – unless you spread two fingers to magnify. Closer view lets you land on single frames. Strange how few notice that swipe, since pinching behaves differently even inside Apple’s own tools – it functions here, yet fails elsewhere. Chop without mercy. See five lifeless seconds up front? Yank them out. Pressing Cancel undoes changes right away – nothing sticks unless you hit Done later. Each step stays changeable until that final tap confirms it.
Also Read: How to Clean a Carpet
Trimming Steps
- Drag the timeline handles.
- Pinch outward for frame-level precision.
- Remove dead space at the beginning or end.
- Review the cut.
- Tap Done when satisfied.
Edit Audio Carefully
Hold still. Silence works without words filling space. Some moments gain strength when quiet takes over. Pauses let images speak louder than audio ever could. During interviews, cutting chatter between answers pulls attention right where it should be. Muting part of a clip means cutting it before you do anything else. Start by placing the playback marker where needed, then press the scissors symbol to divide. Once separated, pick just that piece and turn sound down completely. Doing it this way takes more steps – one cut, one change – but makes each move intentional instead of rushed or broad.
Without smooth audio shifts, the built-in tools fall short. Jump cuts replace crossfades every time you stick to Photos alone. This limit defines what editing choices actually work. Try cutting sound dead instead of a slow fade – sudden silence sometimes hits harder. Out of nowhere, a voice breaks stillness – more jarring than gentle shifts. Not missing something, but boundaries that form how things sound.
Use Filters Sparingly
Instant shifts in vibe come from filters. Yet results shift depending on the device used. A warmer, more intense look appears on the iPhone 12 with “Dramatic Warm.” Meanwhile, the third-gen iPhone SE shows less punch – tones stay closer to flat. That difference? It ties back to camera chip design. Hardware plays a role, not only user choice. Check how it looks on the actual screen when you can. Instead of flashy options such as “Vivid Cold” or “Faded,” go quiet. Small moves beat bold ones. Quiet changes last longer.
Popular Filter Choices
- Dramatic Warm
- Dramatic Cool
- Vivid
- Vivid Warm
- Vivid Cool
- Silvertone
- Noir
Understand Stabilization and Export
During export, stabilization works without sound. Though edits stay fixed, a second pass might smooth jitter – not due to timeline changes, yet from recalculated motion sensors linked to initial capture. Shaky movement may fade when processed again, since unseen routines revisit camera tilt, speed shifts, and scene details. Hidden systems blend hardware feedback with image analysis behind the scenes. Even if nothing looks different, background steps adjust alignment using embedded device signals. Manual control over these adjustments does not exist.
Settings for export remain unchanged by default. When cropping isn’t equal on all sides, resolution shifts to fit. The frame rate won’t go higher than what the recording allowed. Output will be H.264 or HEVC – this depends on your device and whether you picked High Efficiency under Camera > Formats. Choosing a specific codec inside Photos? Not possible. Yet file size changes on its own, tuned by how well the compression works.
Export Facts
| Feature | Notes |
| Frame Rate | Cannot exceed original recording |
| Resolution | May change after cropping |
| Codec | H.264 or HEVC |
| Stabilization | Automatic during processing |
| Manual Codec Selection | Not available |
When to Use Third-Party Apps
When extra layers matter – like words on screen, small windows inside clips, or changing clip speeds – outside tools come into play. Track-based editing lives in LumaFusion. Color control that usually stays on full computers? That’s DaVinci Resolve. Yet mastering them takes time. The more steps there are, the further you drift from what you meant to make. Often, fewer moves leave a clearer mark.
Popular Advanced Editing Apps
- LumaFusion
- DaVinci Resolve
- CapCut
- iMovie
- VN Video Editor
Check Location Data Before Sharing
Hidden detail – geotagged clips keep their map data after editing, only stops when turned off under Settings > Privacy > Location Services > Camera. That little marker sticks around. Could show where you were. Turn it off before passing video that needs discretion.
Review the Final Video
It’s the last look that counts. Pull the video out, play it somewhere else – a different screen, maybe stream it through AirPlay. Shades can tilt one way here, another there. What sounds even in headphones may swamp speech when played loud. How the room is lit while watching twists what you see.
Final Review Checklist
- Watch on another screen
- Listen through speakers
- Check brightness and colors
- Review audio levels
- Confirm export quality
FAQs About Editing Videos on iPhone
Can I edit videos on iPhone without downloading an app?
Yes. The built-in Photos app lets you trim clips, adjust lighting, crop videos, apply filters, and make basic edits without installing any extra apps.
How do I trim a video on my iPhone?
Open the video in Photos, tap Edit, then drag the timeline handles at the bottom to remove unwanted sections. Tap Done to save the changes.
Does editing a video reduce its quality?
Basic edits usually keep quality very close to the original. However, heavy cropping or multiple exports may slightly affect the final resolution.
What is the best free video editor for iPhone?
For simple edits, the Photos app works well. If you need text, effects, or advanced tools, free options like iMovie and CapCut are popular choices.
Can I add text to a video using the Photos app?
No. The Photos app does not support adding text overlays. You will need a third-party app such as iMovie, CapCut, or LumaFusion for that feature.
Most times, one way doesn’t win. What matters is holding back. Spotting the moment a clip no longer needs tweaks – right before too much polish drains it – the real talent hides there. A smartphone lets you shoot wherever, though you must feel where it falls short. Getting good isn’t about piling on apps. It’s choosing what not to touch.